Documentation
Dashmint – Bootstrap Responsive Flat Admin Dashboard HTML5 Template
Welcome to Dashmint – Bootstrap Responsive Flat Admin Dashboard HTML5 Template
- Created Date: 20/03/2020
- Author: Sprukosoft
- Company: Spruko Technologies Private Limited
- Support: support@spruko.com
Thank you for purchasing our admin template. Feel free to contact us any time. We have a dedicated team to provide you the best support. If you want any queries please contact live chat or email : sprukotechnologies@gmail.com
If You Love Our Template Design Please don't forgot to rate it. Thank you so much!
Template Description
Dashmint – Bootstrap Responsive Flat Admin Dashboard HTML5 Template. This Template Includes 100+ HTML Pages & 50+ Plugins more UI elements. It can be used for different various of 5 Dashboards.It Inlcudes LTR & RTL Versions. Different Styles of Widgets etc. Need to do hard work for this template customization. We are design easily understandable code & User Friendly. Advanced Form-Elements like Date pickers,Select2, Multi Select etc. This template using Bootstrap4 framework. This admin template is fully 100% Premium Admin Templates quality. This template designed for using HTML5,CSS3,Jquery. After Purchused you get All HTML files,CSS Files,JS Files.
It has super clean flat user interface admin Backend design, easy customizable components and widgets.The Template comes with a awesome unique design also we ensure you can easily design admin template.
it is a fully responsive layout for all type of devices. Works on all major web browsers, Desktop, iPhone, iPad, Tablet and all other smart phone devices
Once you Purchase Dashmint – Bootstrap Responsive Flat Admin Dashboard HTML5 Template you will be enabled to get free download of all future updates.
Main Features
- 5 Dashboard variations
- 100+ HTML Pages
- Bootstrap Responsive Framework
- Well Commented Code
- 24 * 7 Professional Company Support
- Regular Updates
- 50+ Plugins
- 6 types of Charts
- Select2
- Mail Inbox
- 10 Types of Icons
- File upload
- Message Chat
- Form Elements
- FormAdvanced Elements
- Form Validation
- Form Editor
- Sweet Alerts
- Data Tables
- Lockscreen Page
- Error Page
- Under Construction Page
- User Profile
- Easy to customize
- Google Fonts
- More Widgets
- Invoice Page
- Pricing Tables
- Very Easy to Create your Own Site
- Neat, clean and simple design
- W3C Validated
Folder Structure
HTML/
	├── assets
	   ├── css
	   ├── fonts
	   ├── images
	   ├── js
	   ├── plugins
	   ├── rtl-css
Bowser Support
- Chrome
- Firefox
- IE
- Opera
- Safari
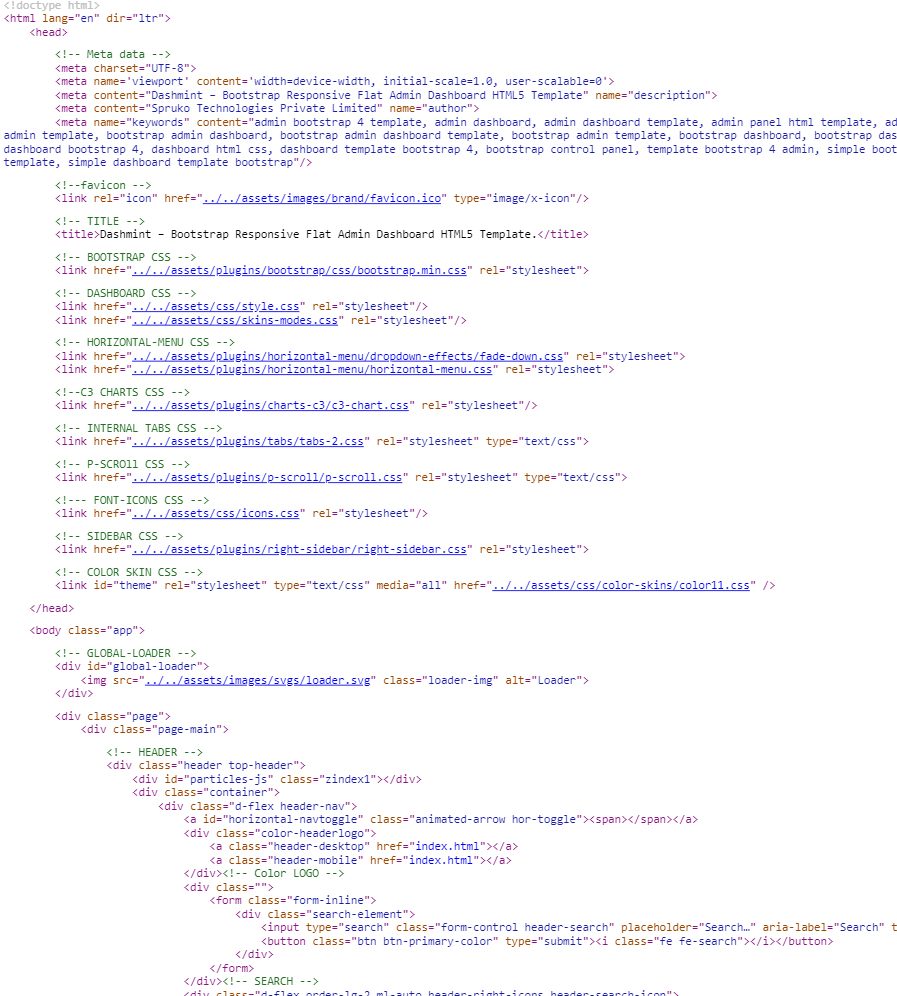
HTML Page Code
CSS Structure
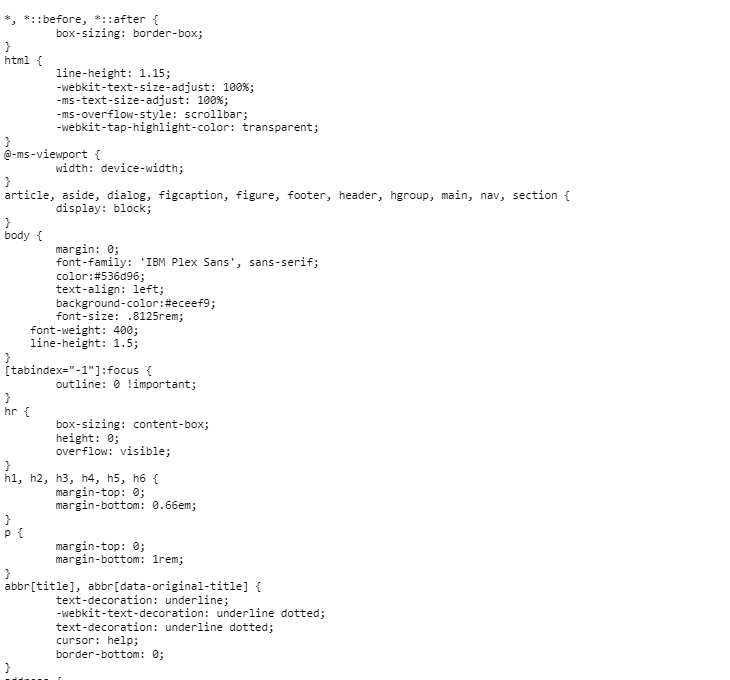
style.css is the main CSS file located in assets/css folder of the package. Whole CSS file is well indexed with topic and its related code.
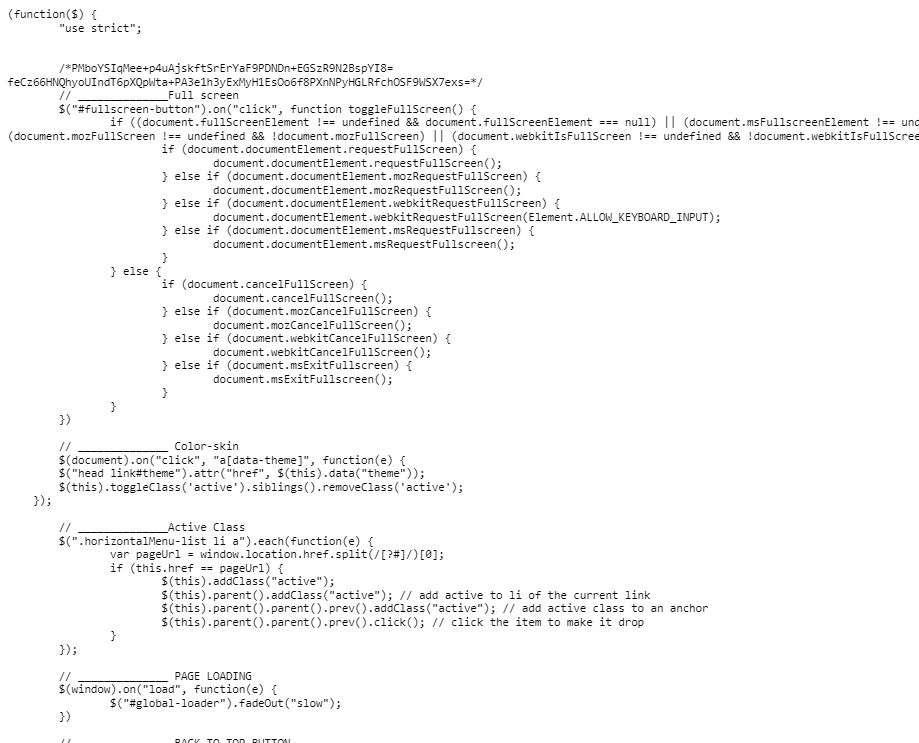
Javascript
custom.js is the mail javascript file having all the js code. File is located in assets/js/ folder. This file code is also well formatted and section in different respective function names.
Along with this chart library based js code and dashboard based js code are added in separate files for ease of use of user.
SCSS & CSS
Rapo comes with power of SCSS. The css files can be generated from scss by simply following below steps:
- Gulp
Gulp is a JavaScipt streaming task runner. It automate many development tasks. Using gulp you can perform tasks like running a local server, minifying code, compilation, Browser sync ,optimizing images, etc... We are using gulp which allows to easily compilation of scss to csss. You can read it more about it here.
Prerequisites
Please follow below steps to install and setup all prerequisites:
- Nodejs
Make sure to have the Node.js installed & running in your computer. If you already have installed nodejs on your computer, you can skip this step, otherwise install nodejs on your computer,
- Gulp
Make sure to have the Gulp installed & running in your computer. If you already have installed gulp on your computer, you can skip this step. In order to install, just run command
npm install -g gulpfrom your terminal.
Installation
To setup, follow below mentioned steps:
- Install Prerequisites
Make sure to have all above prerequisites installed & running in your computer
- Install Dependencies
Open your terminal, go to your folder and enter the command
npm install. This would install all required dependencies innode_modulesfolder.
After you finished with above steps, you can run the command to compile scss into css:
gulp
| Command | Description |
|---|---|
gulp
|
Runs the project locally, starts the development server and watches for any changes in your code, including your html, javascript, sass, etc. The development server is accessible at http://localhost:3000. |
gulp watch
|
In this template gulp watch command is for When any changes to the source file scss folder i.e (.scss) is made, the watch will run an appropriate task.
All the CSS files under assets/css/ folder will be watched and upon changes made to these files, the styles task will be executed.
|
gulp rtlwatch
|
In this template gulp rtlwatch command is for When any changes to the source file scss folder i.e (.scss) is made, the watch will run an appropriate task.
All the rtl-CSS files under assets/rtl-css/ folder will be watched and upon changes made to these files, the styles task will be executed.
|
gulp default
|
In this template gulp default command is for the changes is made in style-dark.scss file in css. style-dark.scss will be watched and what ever changes has made in style-dark.scss file it automatically updated in style-dark.css file in css
|
gulp rtldefault
|
In this template gulp rtldefault command is for the changes is made in style-dark.scss file in rtl-css. style-dark.scss will be watched and what ever changes has made in style-dark.scss file it automatically updated in style-dark.css file in rtl-css
|
gulp closedmenu
|
In this template gulp closedmenu command is for the changes is made in closedmenu.scss file in css. closedmenu.scss will be watched and what ever changes has made in closedmenu.scss file it automatically updated in closedmenu.css file in css
|
gulp rtlclosedmenu
|
In this template gulp rtlclosedmenu command is for the changes is made in closedmenu.scss file in rtl-css. closedmenu.scss will be watched and what ever changes has made in closedmenu.scss file it automatically updated in closedmenu.css file in rtl-css
|
gulp iconmenu
|
In this template gulp iconmenu command is for the changes is made in iconmenu.scss file in css. iconmenu.scss will be watched and what ever changes has made in iconmenu.scss file it automatically updated in iconmenu.css file in css
|
gulp rtliconmenu
|
In this template gulp rtliconmenu command is for the changes is made in iconmenu.scss file in rtl-css. iconmenu.scss will be watched and what ever changes has made in iconmenu.scss file it automatically updated in iconmenu.css file in rtl-css
|
gulp sidemenu
|
In this template gulp sidemenu command is for the changes is made in sidemenu.scss file in css. sidemenu.scss will be watched and what ever changes has made in sidemenu.scss file it automatically updated in sidemenu.css file in css
|
gulp rtlsidemenu
|
In this template gulp rtlsidemenu command is for the changes is made in sidemenu.scss file in rtl-css. sidemenu.scss will be watched and what ever changes has made in sidemenu.scss file it automatically updated in sidemenu.css file in rtl-css
|
gulp tabmenu
|
In this template gulp tabmenu command is for the changes is made in sidemenu-responsive-tabs.scss file in css. sidemenu-responsive-tabs.scss will be watched and what ever changes has made in sidemenu-responsive-tabs.scss file it automatically updated in sidemenu-responsive-tabs.css in css file
|
gulp rtltabmenu
|
In this template gulp rtltabmenu command is for the changes is made in sidemenu-responsive-tabs.scss file in rtl-css. sidemenu-responsive-tabs.scss will be watched and what ever changes has made in sidemenu-responsive-tabs.scss file it automatically updated in sidemenu-responsive-tabs.css in css file in rtl-css
|
gulp boxed
|
In this template gulp boxed command is for the changes is made in boxed.scss file in css. boxed.scss will be watched and what ever changes has made in boxed.scss file it automatically updated in boxed.css file in css
|
gulp rtlboxed
|
In this template gulp rtlboxed command is for the changes is made in boxed.scss file in rtl-css. boxed.scss will be watched and what ever changes has made in boxed.scss file it automatically updated in boxed.css file in rtl-css
|
gulp dark-boxed
|
In this template gulp dark-boxed command is for the changes is made in dark-boxed.scss file in css. dark-boxed.scss will be watched and what ever changes has made in dark-boxed.scss file it automatically updated in dark-boxed.css file in css
|
gulp rtldark-boxed
|
In this template gulp rtldark-boxed command is for the changes is made in dark-boxed.scss file in rtl-css. dark-boxed.scss will be watched and what ever changes has made in dark-boxed.scss file it automatically updated in dark-boxed.css file in rtl-css
|
gulp skin
|
In this template gulp skin command is for the changes is made in skin-modes.scss file in css. skin-modes.scss will be watched and what ever changes has made in skin-modes.scss file it automatically updated in skin-modes.css file in css
|
gulp rtlskin
|
In this template gulp rtlskin command is for the changes is made in skin-modes.scss file in rtl-css. skin-modes.scss will be watched and what ever changes has made in skin-modes.scss file it automatically updated in skin-modes.css file in rtl-css
|
FAQS
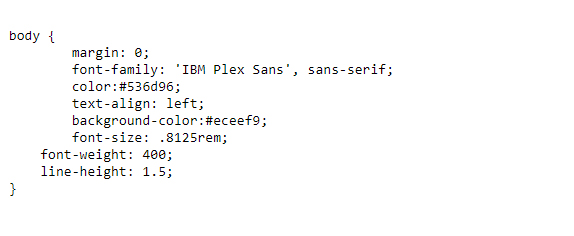
How to Change Font Style ?
Step 1:
Go To style.css is the main CSS file located in "assets/css/style.css " file go to nearest line number 93 .and change the font family
if you want to change another font-family Go to the site Google Fonts And Slect One font Family and import In to style.css file
How to Select font Family
Example:
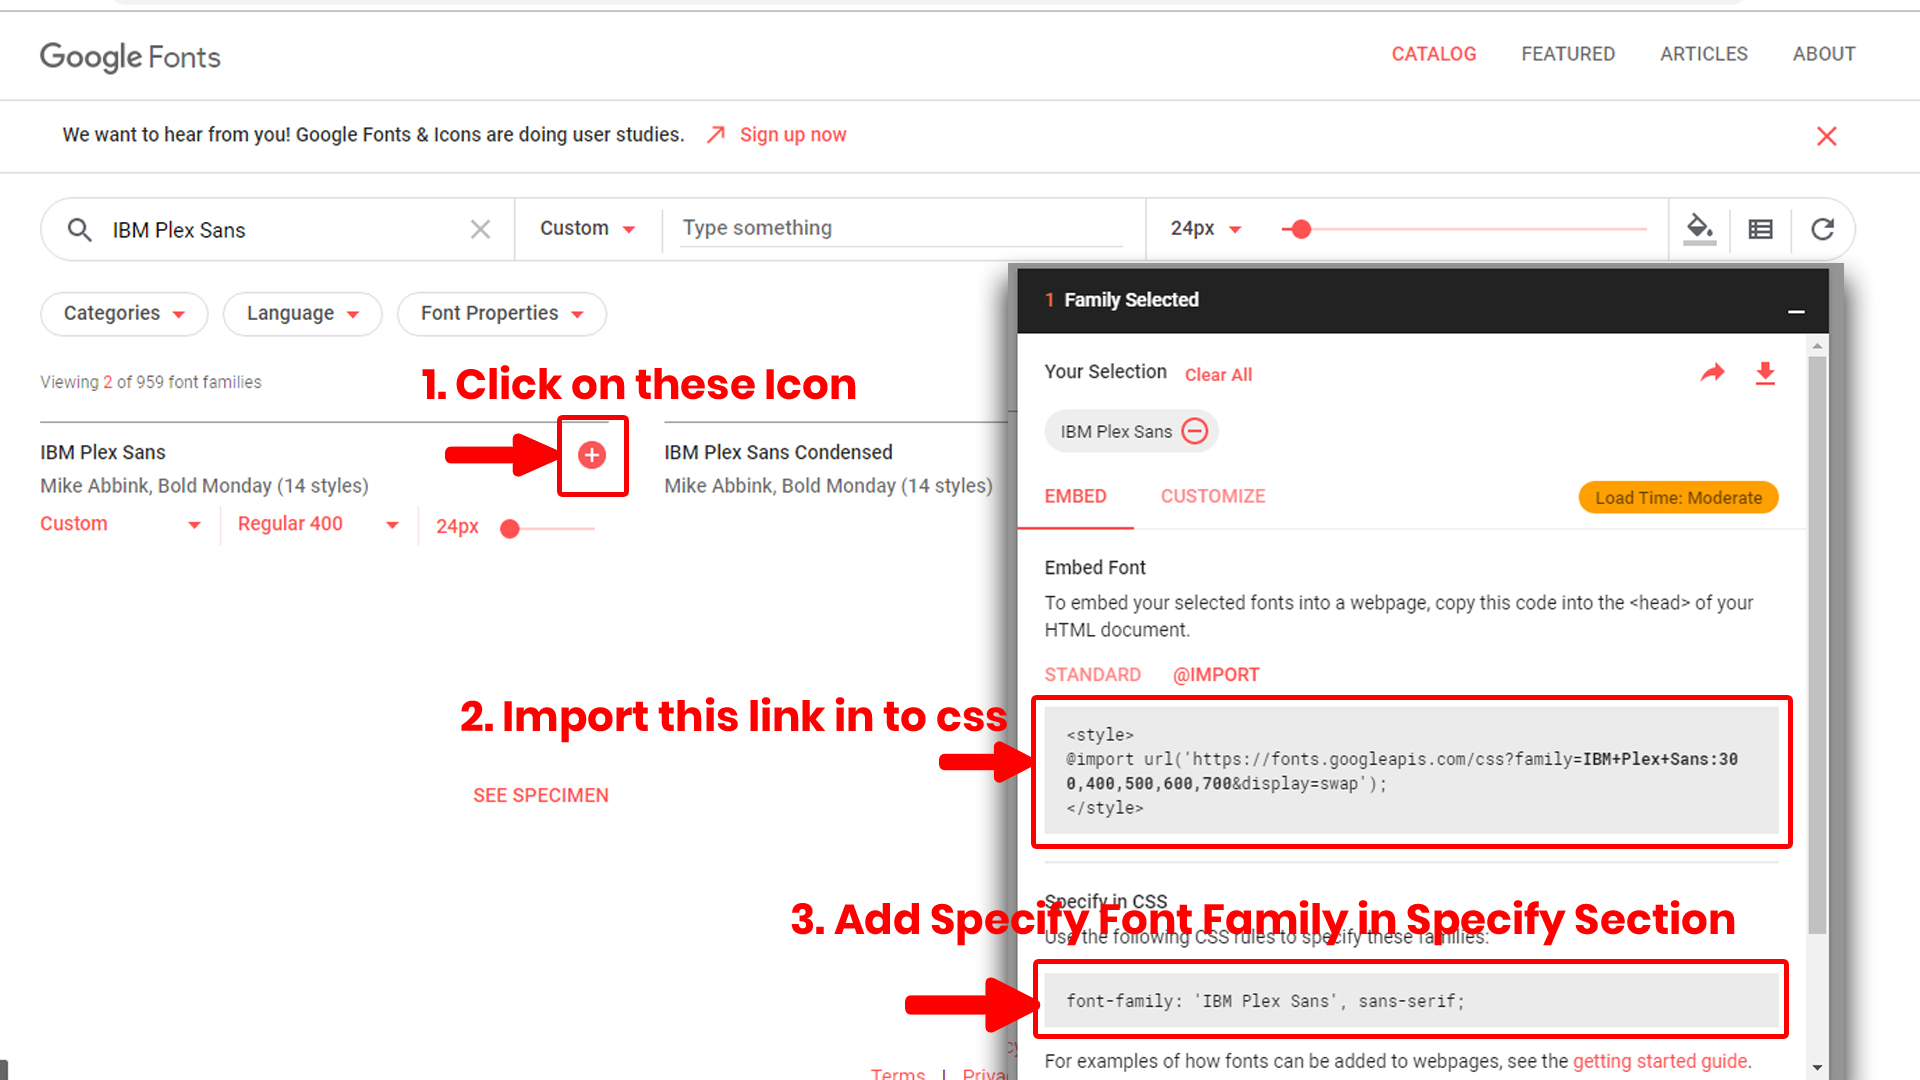
imported font family css

Step 2:
And add Specify font-family css in your style file.
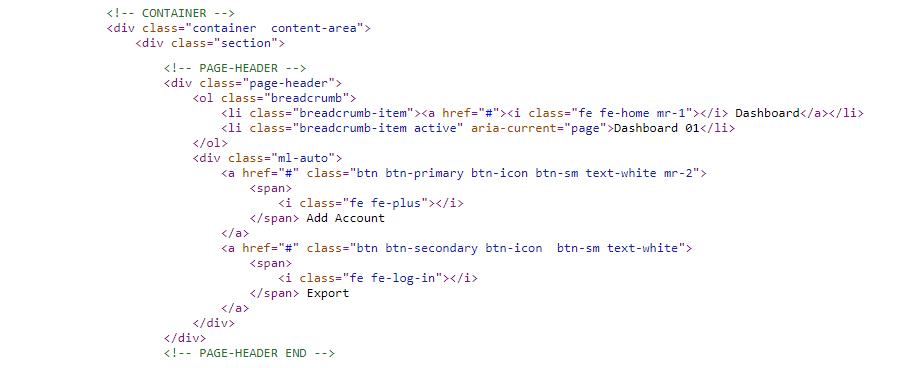
How to move Sectionor Div from one page another page ?
Step 1:
Copy the Particular Section as shown below image and you can paste where ever you want.
Example:
How to Change Colors?
This Template includes 10 flat colors and 5 gradient colors. color1 to color10 are flat colors, and color11 to color15 are gradient colors. You can choose any one of them
Step 1:
Go To any HTML file in Header Section Can you change our color style link. check below Image

Step 2:
for example if you select color5. you want color5 is your default color theme then you can replace the color11 with color5 in all html files (so that you will get you choosen color theme) as shown in below Image

How to Change Light Header ?
Static Method:
Step 1:
Open all HTML files and add light-header to Body Section. As shown in below Image.
Example:

Dynamic Method:
Step 1:
Open custom.js file and add below mentioned line to enable light-header.
Example:

How to Change Horizontal-menu Color ?
Static Method:
Step 1:
Open all HTML files and add color-hor to Body Section. As shown in below Image.
Example:

Dynamic Method:
Step 1:
Open custom.js file and add below mentioned line to enable color-hor.
Example:

How to Change Horizontal-menu Dark ?
Static Method:
Step 1:
Open all HTML files and add dark-hor to Body Section. As shown in below Image.
Example:

Dynamic Method:
Step 1:
Open custom.js file and add below mentioned line to enable dark-hor.
Example:

How to Change Left-menu Light ?
Static Method:
Step 1:
Open all HTML files and add light-leftmenu to Body Section. As shown in below Image.
Example:

Dynamic Method:
Step 1:
Open custom.js file and add below mentioned line to enable light-leftmenu.
Example:

How to Change Left-menu Color ?
Static Method:
Step 1:
Open all HTML files and add color-leftmenu to Body Section. As shown in below Image.
Example:

Dynamic Method:
Step 1:
Open custom.js file and add below mentioned line to enable color-leftmenu.
Example:

How to Change Left-menu Style ?
Static Method:
Step 1:
Open all HTML files and add menu-style1 to Body Section. As shown in below Image.
Example:

Dynamic Method:
Step 1:
Open custom.js file and add below mentioned line to enable menu-style1.
Example:

How to Change Logo ?
Go To "assets/img/brand" folder and replace your logo with Previous Logos within in image size. note: Please don't increase logo sizes. Replace your logo within given image size. otherwise the logo will not fit in particular place it disturbs the template design.
Sources
- Bootstrap FrameWork
- https://getbootstrap.com/
- Jquery
- https://jquery.com/
- Jquery Datepicker
- https://jqueryui.com/datepicker/
- Full Calendar
- https://fullcalendar.io/
- File Uploads
- https://www.jqueryscript.net/demo/jQuery-Plugin-To-Beautify-File-Inputs-with-Custom-Styles-Dropify/
- mcustomScrollbar
- http://manos.malihu.gr/jquery-custom-content-scroller/
- Select2
- https://select2.org/
- Jquery Timepicker
- https://jonthornton.github.io/jquery-timepicker/
- Bootstrap-wizard
- http://vinceg.github.io/twitter-bootstrap-wizard/
- Datatable
- https://datatables.net/examples/styling/bootstrap4
- Font Awesome Icons
- https://fontawesome.com/
- Material Design Icons
- https://materialdesignicons.com/
- Simpleline Icons
- https://iconify.design/icon-sets/simple-line-icons/
- Ionicons
- https://ionicons.com/
- Themify Icons
- https://themify.me/themify-icons
- Bootstrap-Colorpicker
- https://farbelous.io/bootstrap-colorpicker/v2/
- Sparkline Charts
- https://omnipotent.net/jquery.sparkline/#s-about
- Echart
- https://ecomfe.github.io/echarts-examples/public/documentation.html
- Morris Chart
- https://morrisjs.github.io/morris.js/
Font Used
Google fonts are used in the template. They are as follows: Google Fonts
All Images are used: Pexels.com